
Tags and keywords
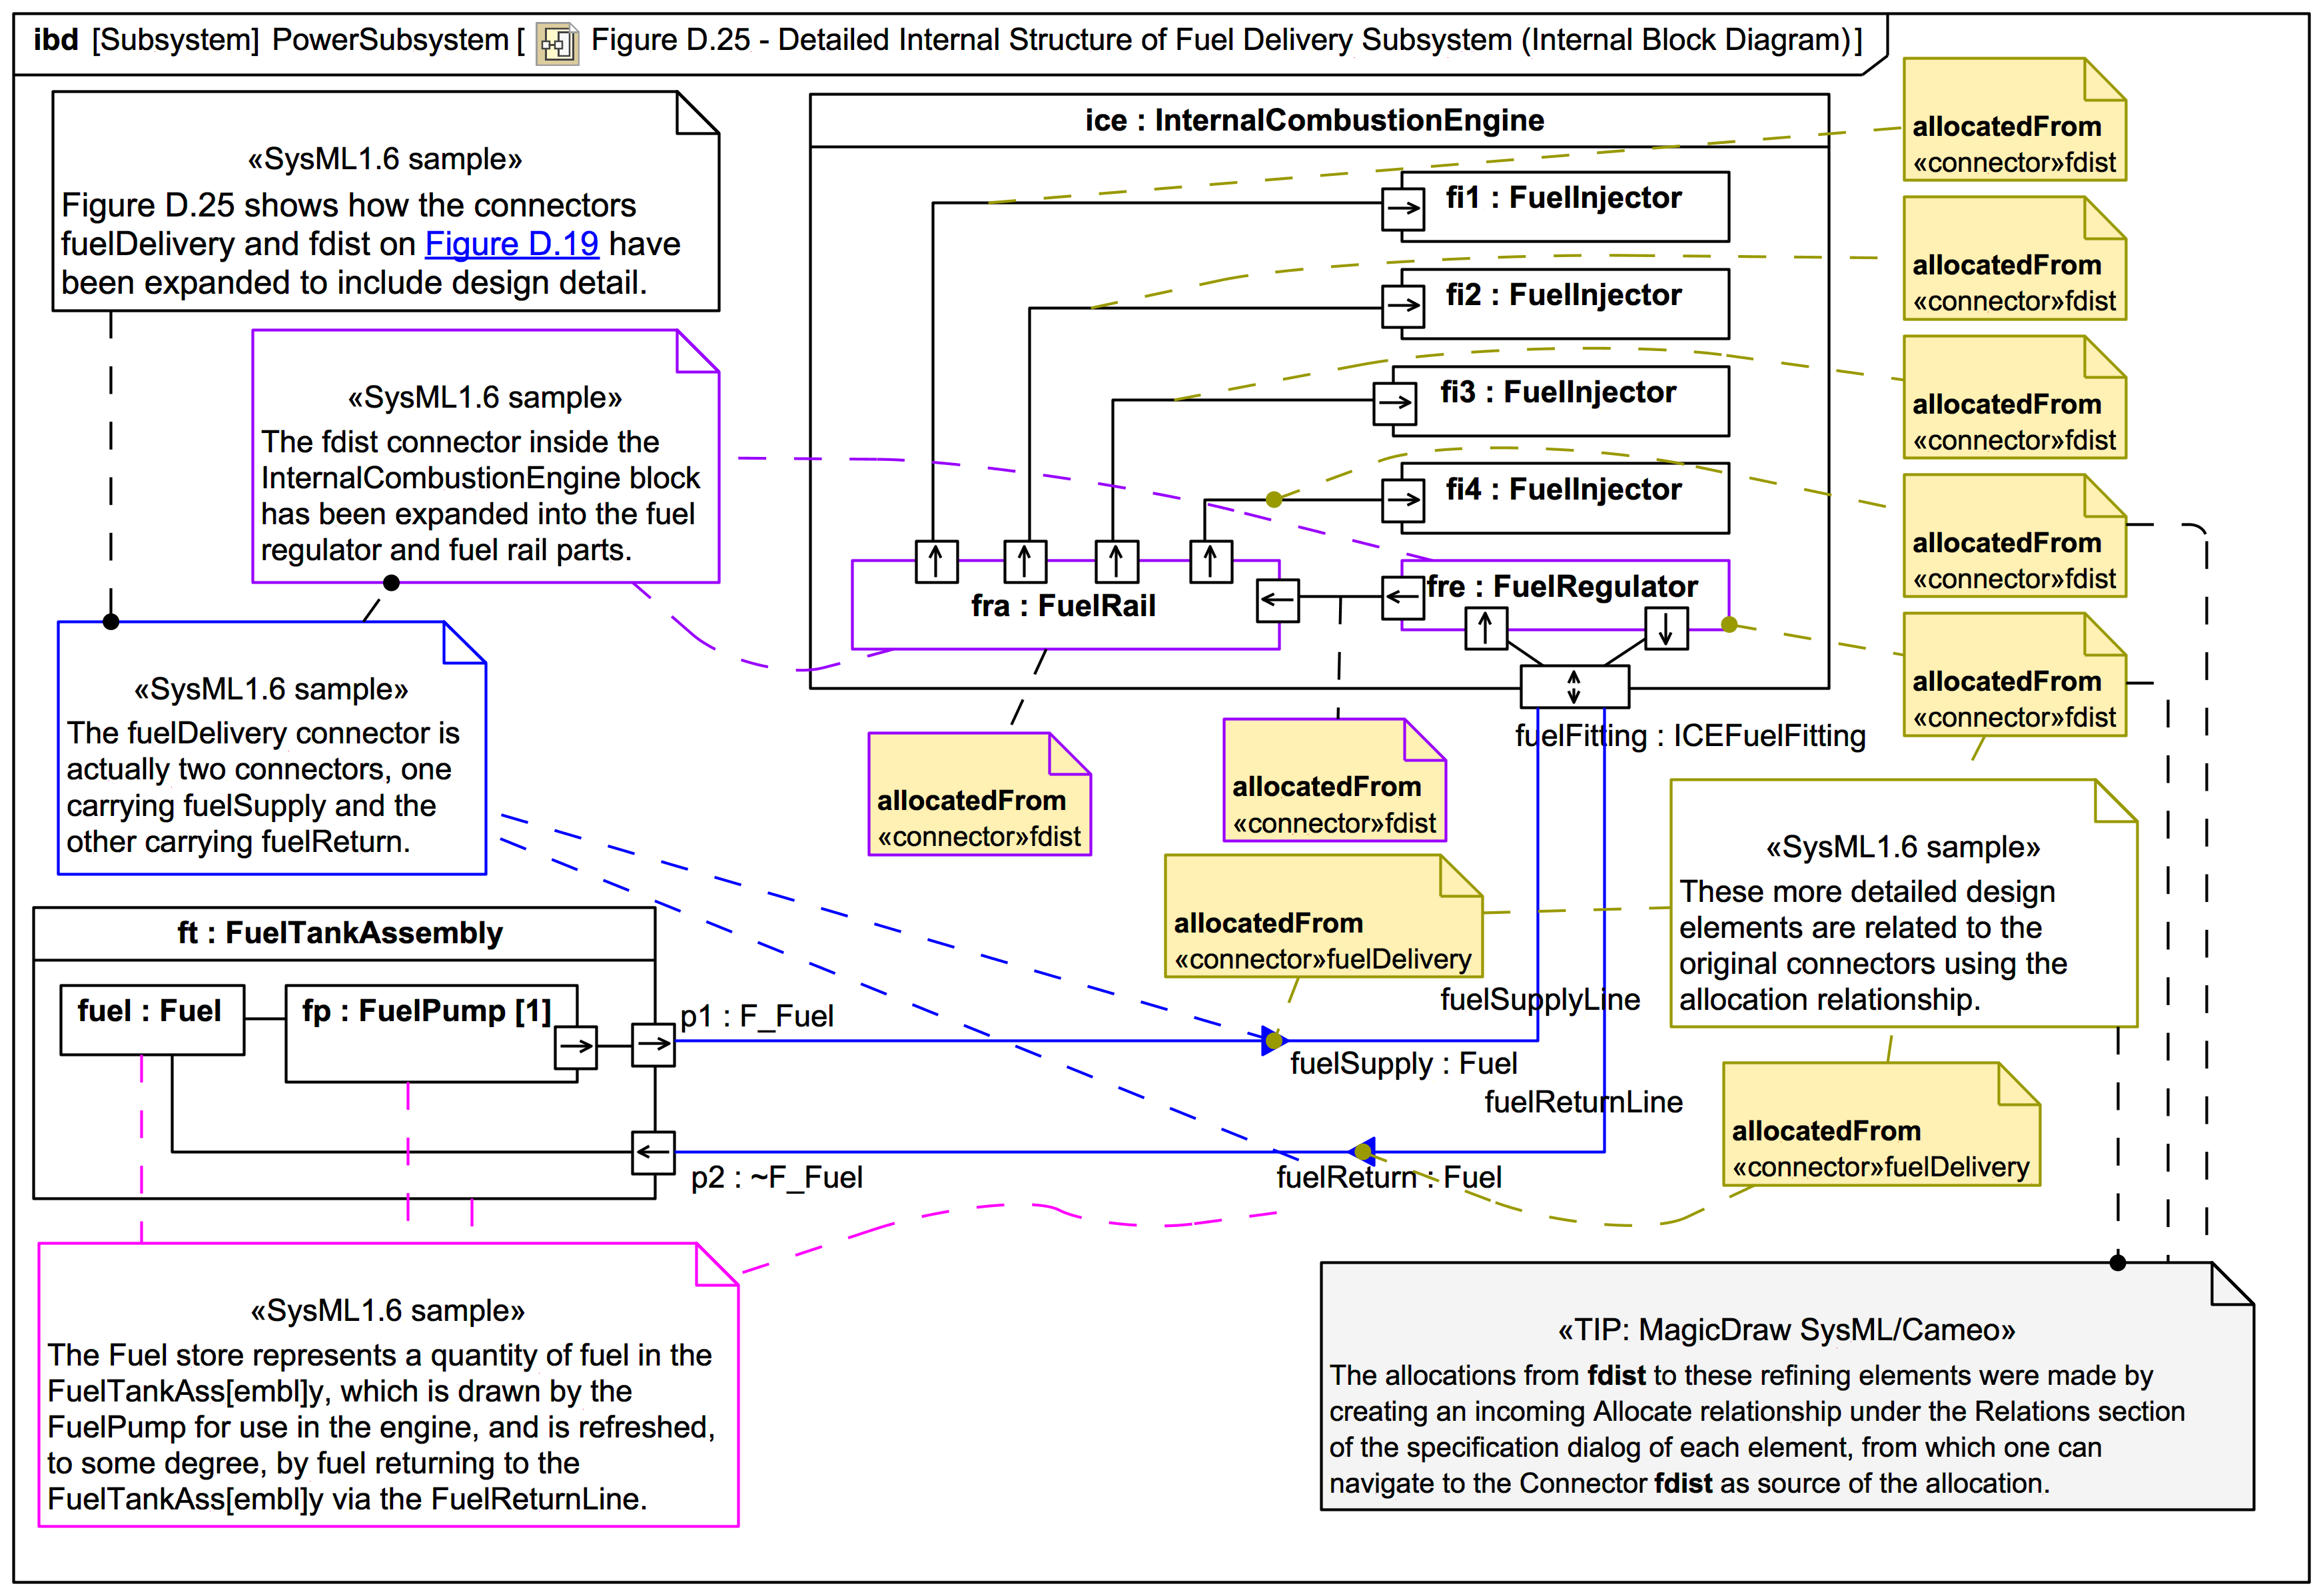
In the trail version of the diagram, the outgoing and incoming port types for the flow of
Fuel are named F_Fuel and ~F_Fuel (not shown on every Port). The spec has these Port types as Fuel: