
Tags and keywords
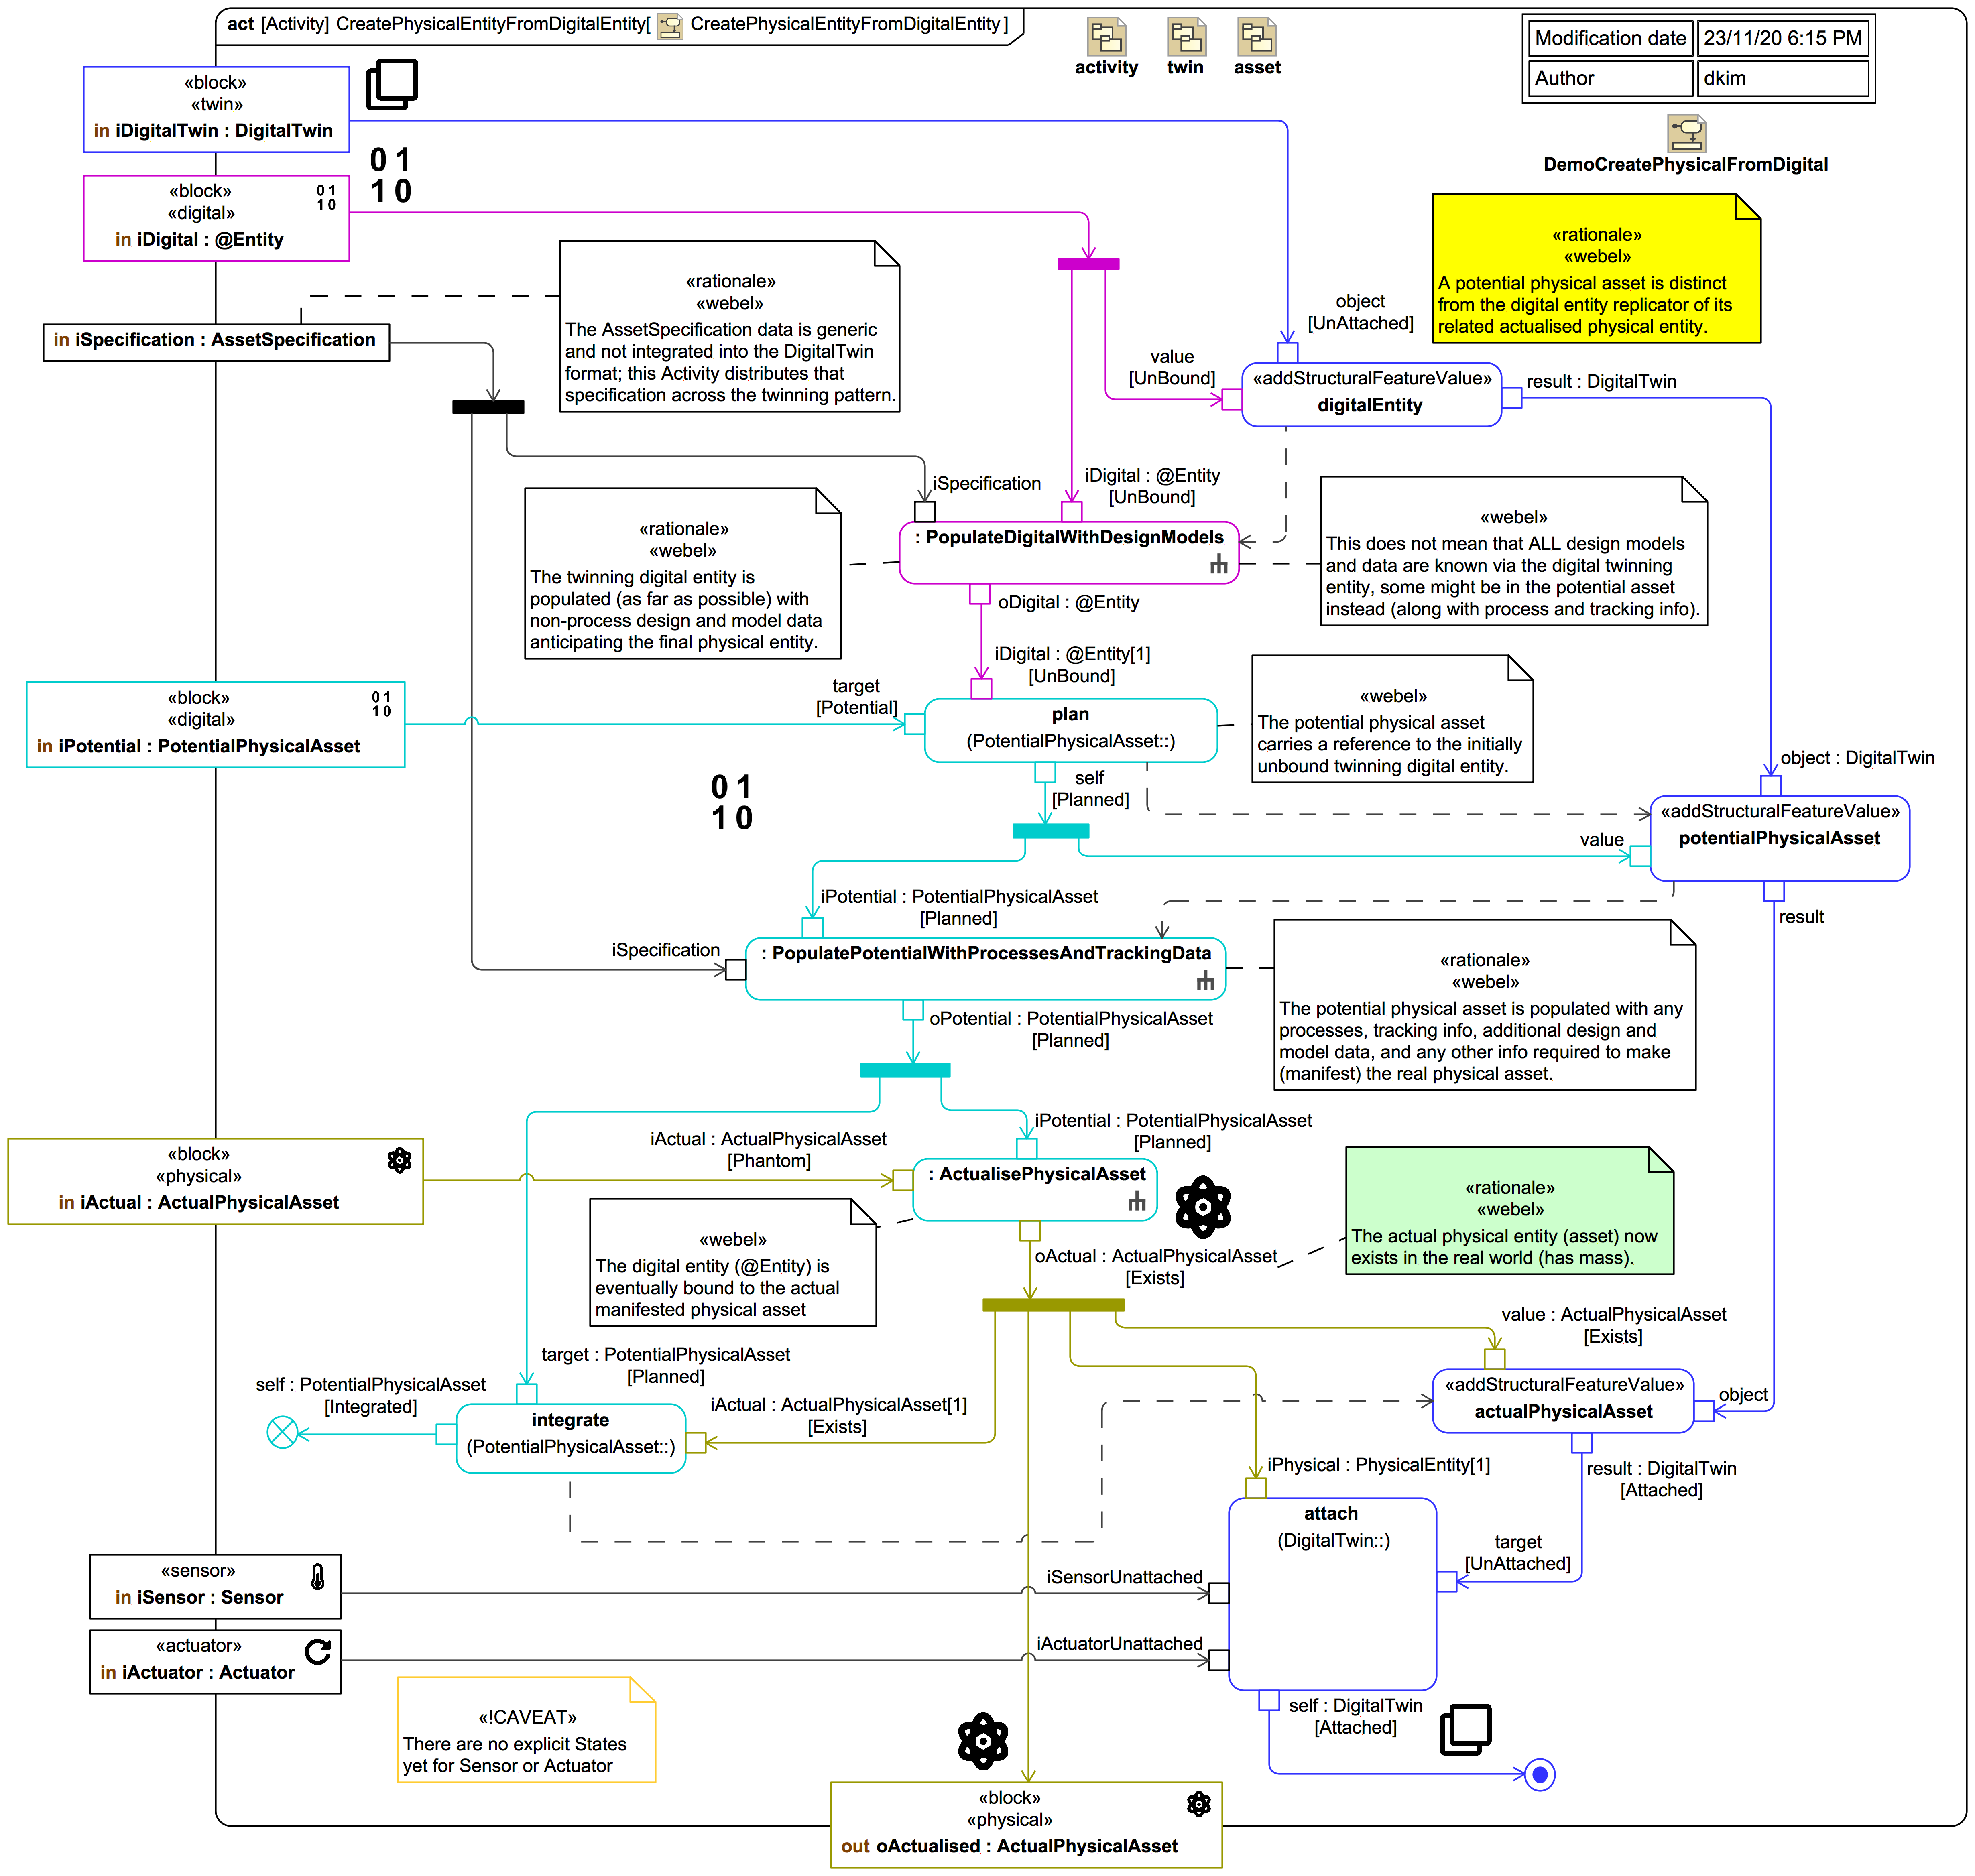
The UnBound input «digital» ![]()
@Entity is assigned as the digitalEntity of the «twin» DigitalTwin . It is then populated with design or "template/prototype" data such as 3D model data, spatial information, and materials data (but NOT any process-related data) via PopulateDigitalWithDesignModels (which we'll inspect in more detail soon). It is then assigned via a CallOperationAction for plan to the «digital» ![]()
PotentialPhysicalAsset , which transitions from state Potential to state Planned.
The «digital» ![]()
PotentialPhysicalAsset is assigned to the «twin» DigitalTwin and then populated with any process-related or auxiliary information required to track and create an «physical» ActualPhysicalAsset .
The input Phantom «physical» ActualPhysicalAsset is then created (built, manufactured or otherwise) via ActualisePhysicalAsset, after which it is in the state Exists (which means it now has Mass). It can then be set via a CallOperationAction for integrate as the target of the «digital» ![]()
PotentialPhysicalAsset , which transitions from state Potential to state Integrated.
The «physical» ActualPhysicalAsset is then assigned to the «twin» DigitalTwin , and via a CallOperationAction for attach the «twin» DigitalTwin and the «sensor» Sensor and «actuator» ![]()
Actuator are attached. The synchronisation cycle can then start (as shown on this previous higher-level diagram).